Complete Guide to Surface Preparation Before Painting
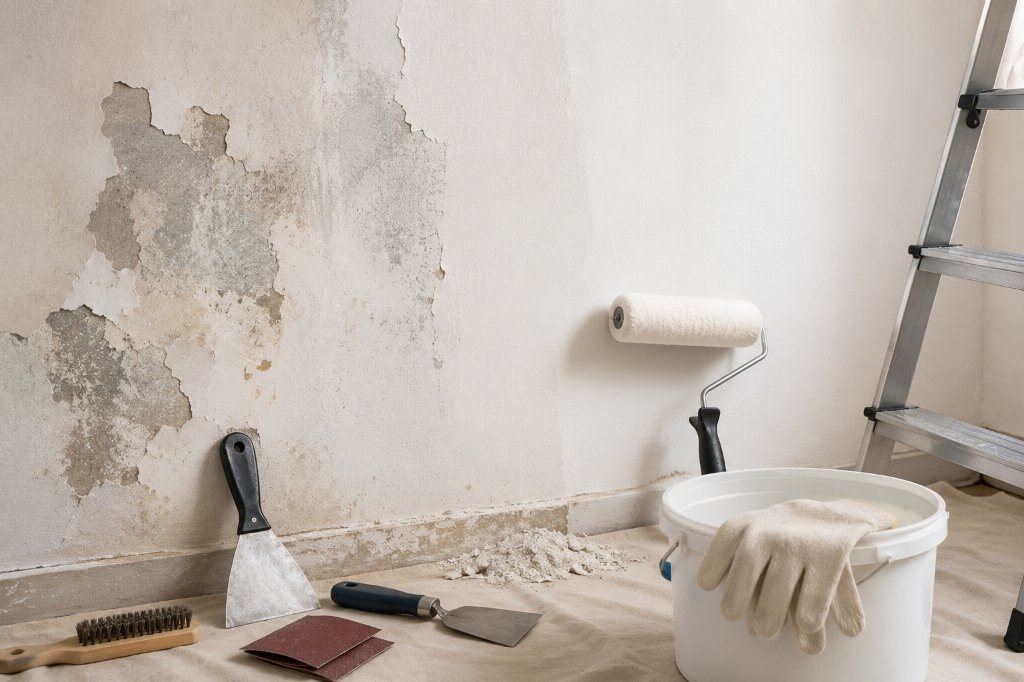
Painting is one of the most effective ways to improve the appearance and durability of walls, furniture, metal structures, wooden surfaces, and industrial equipment. However, even the highest-quality paint cannot deliver excellent results if it is applied to a poorly prepared surface. Proper surface preparation is the key to achieving a durable and flawless paint finish. It ensures proper paint adhesion, enhances durability, and creates a smooth, professional finish that lasts for years.
Whether you're painting a residential wall, refinishing wooden furniture, protecting metal structures, or coating industrial equipment, investing time in proper surface preparation can save you from costly repairs, peeling paint, and uneven finishes in the future.
In this comprehensive guide, we'll explore why surface preparation matters, the essential steps involved, and practical tips to achieve long-lasting, professional-quality painting results.
Why Surface Preparation Matters Before Painting
Many people assume that painting simply involves applying a fresh coat of paint. In reality, the condition of the surface underneath determines how well the paint performs over time.
Proper surface preparation helps:
- Improve paint adhesion
- Prevent peeling and blistering
- Increase paint durability
- Deliver a smooth and attractive finish
- Reduce future maintenance costs
- Protect surfaces from moisture, rust, and environmental damage
Professional painters often spend more time preparing the surface than actually applying paint because they understand that preparation directly impacts the final outcome.
Benefits of Proper Surface Preparation
1. Better Paint Adhesion. Dust, grease, loose particles, or old flaking paint prevent fresh paint from bonding correctly. Cleaning and preparing the surface creates a strong foundation that allows the paint to adhere effectively.
2. Longer Lasting Finish. Well-prepared surfaces significantly extend the life of the paint system. Proper preparation minimizes cracking, fading, and peeling, ensuring the coating remains intact for years.
3. Professional Appearance. Surface imperfections become more noticeable after painting. Repairing cracks, dents, and uneven areas before painting results in a cleaner, smoother, and more attractive finish.
4. Reduced Paint Consumption. A smooth, properly prepared surface allows paint to spread evenly and deliver better coverage. This can reduce the number of coats needed, helping save both time and painting materials.
5. Enhanced Protection. Surface preparation combined with suitable primers provides additional protection against corrosion, moisture, mildew, UV exposure, and general wear, depending on the application.
Step-by-Step Surface Preparation Process
Following a systematic approach ensures the best possible painting results.
Step 1: Inspect the Surface Thoroughly
Begin by examining the entire surface to identify any damage, dirt, or imperfections that could affect the quality of the paint finish. Check for:
- Dirt and dust
- Oil or grease stains
- Cracks and holes
- Loose plaster
- Rust
- Mold or mildew
- Water damage
- Peeling paint
- Surface unevenness
Identifying these issues early helps determine the appropriate repair and preparation methods.
Step 2: Clean the Surface Properly
Cleaning is the most critical step before painting. Paint cannot bond effectively to contaminated surfaces. Different surfaces require different cleaning methods.
Interior Walls: Remove dust, cobwebs, grease, fingerprints, and smoke residue using mild detergent with clean water. Allow the surface to dry completely.
Wooden Surfaces: Clean away dust, wax, polish residue, and oil stains. A wood cleaner or mineral spirits can help remove stubborn contaminants before sanding.
Metal Surfaces: Metal should be free from rust, grease, machine oil, and dirt. Industrial degreasers or solvent cleaners are commonly used before applying metal primers.
Concrete Surfaces: Concrete often contains cement dust, efflorescence, dirt, and loose particles. Pressure washing or wire brushing may be necessary before painting.
Step 3: Remove Old Paint
Painting directly over loose or peeling paint often leads to premature coating failure. Methods include:
- Paint scraper
- Wire brush
- Sandpaper
- Heat gun (for suitable surfaces)
- Chemical paint remover (where appropriate)
Continue until all loose material has been removed. Only stable, firmly adhered paint should remain.
Step 4: Repair Surface Imperfections
Every crack or hole becomes more visible after painting. Repair damaged areas before applying primer.
Walls: Fill nail holes, repair plaster cracks, patch damaged drywall, and smooth uneven areas with putty.
Wood: Repair dents, splits, nail holes, and minor cracks with wood filler to provide an even surface before sanding.
Metal: Replace severely corroded sections when necessary. Minor corrosion should be treated using rust removers or mechanical cleaning methods.
Step 5: Sand the Surface
Sanding creates microscopic scratches that improve paint adhesion. It also removes rough edges and creates a smooth finish. Different surfaces require different grit sizes.
Wood: Start with medium grit and finish with fine grit for a smooth surface.
Walls: Light sanding removes roller marks, filler ridges, and minor imperfections.
Metal: Light sanding removes oxidation while creating a surface profile suitable for primers.
Always sand evenly without damaging the underlying material.
Step 6: Remove Dust Completely
After sanding, dust must be removed before painting. Use a vacuum cleaner, soft brush, tack cloth, damp microfiber cloth, or compressed air for industrial applications. Skipping this step can trap dust beneath the paint, creating a rough finish and reducing adhesion.
Step 7: Apply the Right Primer
Primer is an essential bridge between the surface and the paint. It seals porous materials, improves adhesion, enhances durability, and creates a uniform base for the topcoat. Different surfaces require different primers:
- Wall Primer: Reduces paint absorption and improves the finish of emulsion or interior paints.
- Wood Primer: Seals porous timber, prevents uneven absorption, and improves the appearance of wood coatings.
- Metal Primer: Protects steel and iron against corrosion while improving paint adhesion.
- Concrete Primer: Stabilizes porous masonry surfaces and improves coating performance.
Step 8: Allow Proper Drying Time
Each preparation step should be allowed to dry fully before proceeding. Painting over damp surfaces can cause blistering, peeling, bubbling, mold growth, and poor adhesion. Always follow the recommended drying time for cleaners, fillers, and primers before applying the final paint.
Surface Preparation for Different Materials
Preparing Walls Before Painting. Begin by thoroughly cleaning the wall to eliminate dust, cobwebs, grease, and other surface contaminants. Inspect the wall for cracks, nail holes, or damaged plaster, then repair these areas with a suitable wall putty or filler. Once dry, lightly sand the repaired sections and remove all dust before applying a high-quality wall primer.
Preparing Wooden Surfaces. Remove any wax, polish, dirt, or loose coatings. Sand the surface thoroughly to create a smooth texture and repair dents or cracks using wood filler if necessary. Finish by cleaning away sanding dust and applying a wood primer to improve adhesion and achieve a consistent finish.
Preparing Metal Surfaces. Remove rust using a wire brush, sandpaper, or mechanical tools, and clean away grease or oil with an appropriate solvent. Once the surface is clean and dry, apply a corrosion-resistant metal primer before the finishing coat.
Preparing Concrete and Masonry Surfaces. Clean the surface thoroughly using a wire brush or pressure washer. Allow the surface to dry completely before repairing any cracks or holes with a suitable masonry filler. Once repairs have cured, lightly sand rough areas and remove all dust before applying a masonry primer.
Common Surface Preparation Mistakes to Avoid
- Painting Over Dust and Dirt: Always clean the surface thoroughly before priming or painting.
- Ignoring Surface Repairs: Cracks, holes, and dents become more noticeable after painting.
- Skipping Sanding: Sanding creates a slightly rough texture that helps paint grip the surface more effectively.
- Not Using Primer: Primer creates a stable base for the paint and promotes stronger bonding.
- Painting on Damp Surfaces: Moisture trapped beneath paint leads to blistering, peeling, and mold growth.
- Choosing the Wrong Products: Using the wrong primer or paint can reduce durability and negatively affect the final appearance.
Professional Tips for a Long-Lasting Paint Finish
- Always inspect the entire surface before beginning work.
- Use quality cleaning materials and appropriate repair compounds.
- Choose a primer specifically designed for the surface being painted.
- Allow sufficient drying time between each preparation step.
- Sand repaired areas until they are smooth and level with the surrounding surface.
- Remove all sanding dust before applying primer.
- Apply primers and paints under suitable weather and environmental conditions.
- Use high-quality paints and coatings for better protection and longevity.
- Apply paint in thin, even layers to achieve a uniform appearance.
- Regularly maintain painted surfaces to extend their lifespan.
Choosing the Right Primer for Different Surfaces
For interior walls, a wall primer helps seal porous plaster and creates a smooth, uniform finish. For wooden surfaces, wood primers reduce uneven absorption and enhance adhesion. For metal surfaces, metal primers provide excellent corrosion resistance. For concrete and masonry, masonry primers strengthen porous surfaces and improve the performance of paints.
Why Quality Paint Matters
Surface preparation is only one part of achieving exceptional painting results. Equally important is selecting premium-quality paints and coatings designed for the intended application. High-quality coatings offer better colour retention, improved weather resistance, enhanced protection against moisture and corrosion, excellent adhesion, greater durability, easier maintenance, and a superior finish with fewer coats.
Why Choose Zorvanta?
At Zorvanta, we understand that every successful painting project begins with proper preparation and ends with high-performance coatings. Our range of paints, primers, wood finishes, and protective coatings is developed to deliver durability, aesthetics, and long-lasting performance across residential, commercial, and industrial applications.
By combining the correct surface preparation techniques with Zorvanta's advanced coating products, you can achieve a finish that not only looks exceptional but also withstands everyday wear and environmental challenges. Explore our full product range, or request a quotation for your next project. You can also contact our team for expert guidance.
Frequently Asked Questions (FAQs)
1. Why is surface preparation important before painting?
Surface preparation removes dirt, grease, loose paint, and imperfections, allowing paint to adhere properly and increasing the lifespan of the finish.
2. Can I paint directly over old paint?
Only if the existing paint is clean, firmly bonded, and in good condition. Loose or peeling paint should always be removed before repainting.
3. Is primer necessary before painting?
In most cases, yes. Primer improves adhesion, seals porous surfaces, enhances paint coverage, and provides a more durable finish.
4. What is the recommended drying time for primer?
The drying period depends on the type of primer and factors such as temperature and humidity. Always follow the manufacturer's recommendations before applying the topcoat.
5. Which surfaces require sanding before painting?
Wood, repaired drywall, metal, and previously painted surfaces generally benefit from sanding to improve adhesion and create a smoother finish.
6. Can I paint over a damp wall?
No. Painting over damp surfaces can lead to blistering, peeling, mold growth, and reduced paint durability.
7. How do I prepare rusty metal before painting?
Remove all loose rust using a wire brush or sandpaper, clean the surface thoroughly, and apply a corrosion-resistant metal primer before painting.
8. What is the biggest mistake people make before painting?
One of the biggest mistakes is applying paint without properly cleaning, repairing, and preparing the surface first. Poor cleaning, inadequate repairs, or failing to use primer can significantly reduce the quality and lifespan of the paint finish.
Need help choosing the right finish?
Talk to our team or request a tailored quotation for your project.