Painting & Refinishing Wooden Furniture: The Complete Indian Homeowner's Guide
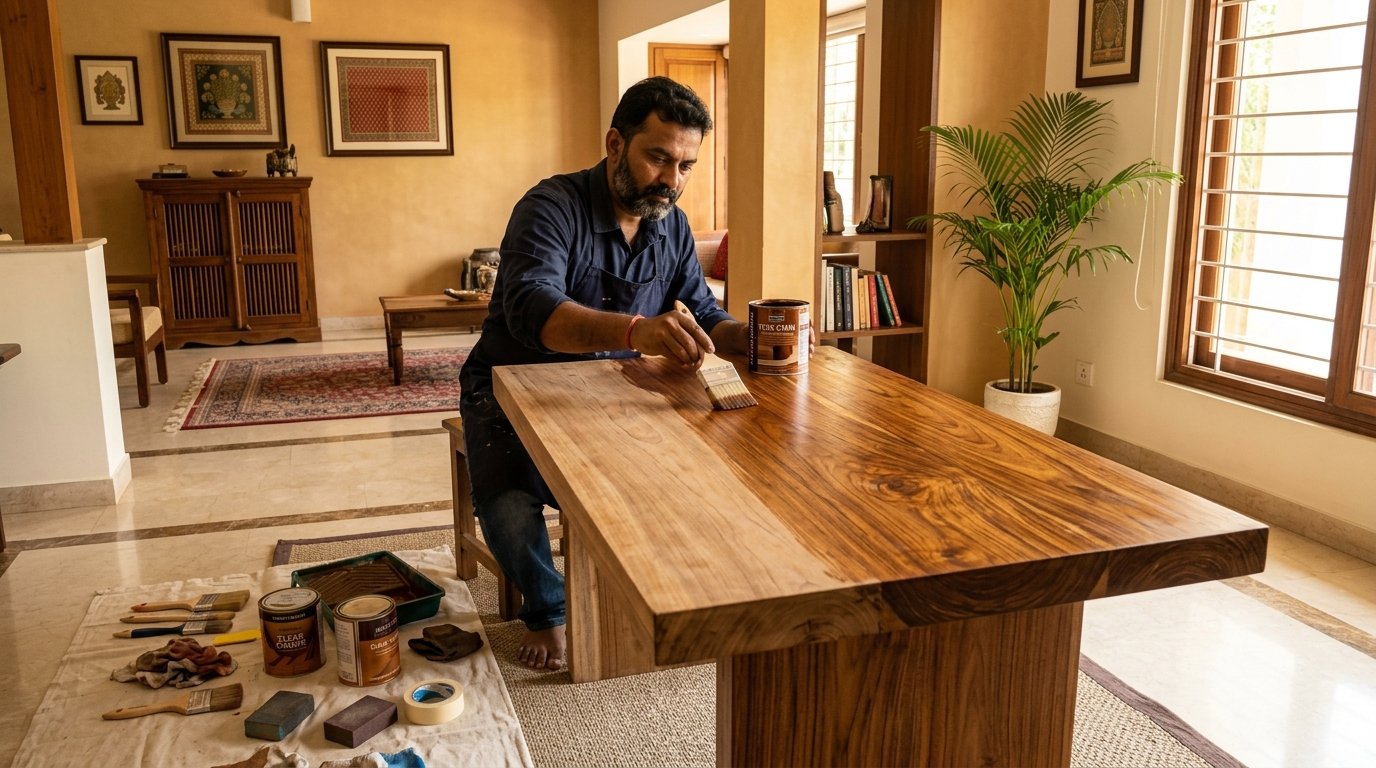
Walk through almost any Indian home and you will find at least one piece of solid wooden furniture that carries real history — a teak dining table that has hosted twenty years of family meals, a rosewood almirah inherited from a grandparent, a study desk that three generations of children have worked at. These pieces are often structurally sound — solid hardwood joinery is built to last far beyond a single generation — but their surfaces tell every year of that history in scratches, stains, faded finish, and the slow discolouration that comes from years of exposure to Indian climate conditions.
The reflex response — particularly when the furniture looks tired — is to think about replacement. But replacing a well-made solid hardwood piece with new flat-pack furniture is a step backward in both quality and environmental impact. The better alternative, and the one that produces a genuinely satisfying result, is refinishing: stripping the old surface back, repairing any damage to the wood, and applying a fresh finish that can make a forty-year-old teak table look better than it did when it was new. This guide explains exactly how to do that — the right way, with the right products, in the right sequence.
Understanding What You Are Working With: Wood Types and Their Behaviour
Before any product is opened, the first step is understanding the wood species you are working with. Indian furniture is dominated by a handful of species — teak, rosewood (sheesham), neem, sal, mango, and rubber wood — and each behaves differently when sanded, stained, and finished. Getting the species right determines which products will work and which will produce unexpected results.
Teak is the premier hardwood of Indian furniture. It is dense, extremely resistant to moisture and insects, and contains natural oils that give it its characteristic warm brown colour and weathering resistance. Those same natural oils — particularly silica and rubber compounds — can interfere with paint adhesion and slow the drying of oil-based finishes. Teak almost always requires a de-oiling wipe with a solvent (thinners or acetone) before any finish is applied, and it is one of the few woods where a specific teak-compatible primer or teak oil makes a meaningful difference to adhesion and finish quality.
Sheesham (rosewood) is another dense, close-grained hardwood that is widely used in Indian furniture, particularly in Rajasthan and the north. It has a beautiful natural grain pattern with warm purple-brown tones, and it takes stains and finishes well when properly prepared. Like teak, it benefits from de-oiling before finishing, and its natural colour richness means it is often best finished with a clear or lightly tinted varnish rather than a heavy opaque paint that would conceal the grain.
Mango wood is a softer, more porous hardwood that has become extremely popular in mid-range Indian furniture over the past decade. It absorbs stain readily, which can be an advantage for achieving rich colour, but it also means that stain application must be controlled — mango wood can absorb unevenly, producing blotchy results if applied without a pre-stain wood conditioner. It is more susceptible to moisture-related movement than teak or sheesham, which means the final finish barrier is proportionally more important.
Rubber wood and engineered wood — increasingly common in budget furniture — requires careful surface assessment before refinishing. Rubber wood is a light, uniform-grained timber that takes paint and stain reasonably well. Engineered wood (MDF, particleboard with veneer) is more problematic: the veneer can be too thin to safely sand, and the substrate beneath it is not solid wood and will not respond to staining the same way. For veneered furniture, the goal is usually a light clean-up, repair of any veneer damage, and a topcoat application rather than a full strip-and-stain refinish.
Step One: Stripping the Old Finish — When and How
The first decision in any furniture refinishing project is whether to strip the existing finish completely or work over it. The answer depends on the condition of the existing finish and what you want to achieve.
If the existing finish is sound — no flaking, no peeling, no deep cracks — and you are simply changing the topcoat colour or applying a fresh clear coat over the same colour, you may be able to work over the existing finish after thorough cleaning and light sanding. This is the lowest-effort path and is appropriate for furniture in reasonable condition that simply needs freshening up.
If the finish is failing — lifting, bubbling, heavily scratched, or deeply stained — stripping back to bare wood is the only approach that will produce a result you are satisfied with long term. Applying fresh paint over a failing finish transfers the failure to the new coat. Within one season, the new paint will lift in the same areas the old one did, because the substrate it bonded to was not sound.
For full stripping, a chemical paint stripper applied generously to the surface and allowed to dwell for the time specified on the product — typically 20 to 40 minutes — softens the old finish and allows it to be scraped away cleanly with a wide flat blade. Work in a ventilated area: most chemical strippers have strong solvent fumes. Wear gloves and keep the stripper away from skin. After scraping, a second application to stubborn areas, followed by light scrubbing with steel wool or a stiff brush and white spirit, removes the residue. Allow the wood to dry completely before any further work — wood that has been wetted by stripper chemicals needs at least 24 hours in a well-ventilated space to dry before sanding.
For furniture with multiple paint layers, a heat gun is a useful complement to chemical stripper — heat softens the paint film and allows faster scraping of thick accumulations, particularly on flat surfaces. Do not use a heat gun on veneered furniture, as the heat can buckle or lift the veneer.
Step Two: Sanding — The Most Important and Most Rushed Stage
Sanding is where the quality of the final finish is built or lost. A beautiful topcoat applied over a poorly sanded surface will look worse than a modest topcoat applied over a perfectly prepared one, because surface defects visible before painting remain visible — and often become more visible — after a shiny topcoat goes on.
Start with a coarser grit — 80 to 100 grit — to remove any residual stripper residue, old finish that the chemical strip did not fully remove, deep scratches, and any surface irregularities in the wood. Sand with the grain, not across it. Cross-grain sanding leaves scratches that become visible in the finished surface, particularly under stain. On large flat surfaces like table tops, a random orbital sander makes the work faster and produces more consistent results than hand sanding alone. On curved sections, edges, turned legs, and detailed carving, hand sanding with the paper wrapped around a shaped block or folded to fit the profile is the only reliable approach.
Progress through the grits — 100, 150, then 180 or 220 — with each finer grit removing the scratch marks left by the previous one. After the final grit, wipe the surface clean with a tack cloth or a lint-free cloth dampened lightly with white spirit to remove all sanding dust before assessing the surface. In good raking light — a single directional light source held close to the surface — any remaining scratches, mill marks, dents, or grain tear-out become visible and can be addressed before the first finish coat goes on.
For teak and oily hardwoods, wipe the sanded surface with a cloth dampened with acetone or thinners before applying any finish. This removes the surface oil layer that has been exposed by sanding and allows better adhesion of the primer or first finish coat. The acetone evaporates quickly — allow 10 to 15 minutes before applying any product.
Step Three: Repairs — Filling Dents, Cracks, and Surface Damage
After stripping and initial sanding, assess the bare wood for any structural damage — cracks in the wood, loose joints, missing veneer sections, deep dents, or old screw holes that need filling. Address all of these before applying any finish.
For small dents, a damp cloth held against the dent and a household iron applied briefly over the cloth can raise compressed wood fibres back toward their original position. The steam from the cloth causes the fibres to swell. This works well on fresh dents in solid hardwood where the fibres are compressed but not torn. Once the wood has dried from this treatment, sand the area smooth.
For cracks, splits, and open grain in solid wood, a wood filler matched to the colour of the wood species produces the most discreet repair under a clear or semi-transparent stain finish. For furniture that will be painted in an opaque colour, a standard ready-mixed wood putty or fine surface filler is appropriate. Apply the filler slightly proud of the surrounding surface, allow to fully cure, and sand flush. Deep cracks or structural splits in table tops and chair frames should be addressed by a furniture repair specialist before refinishing — a filler cannot restore structural integrity, and a glued repair with fresh wood must be done before the refinishing work proceeds.
Choosing Your Finish: Stain, Paint, or Clear Coat?
The most significant creative decision in any furniture refinishing project is the finish type. This determines whether the natural wood grain will be visible, partially enhanced, or completely concealed, and it determines the durability, maintenance requirements, and character of the finished surface.
Clear varnish or lacquer — the transparent finish — is the right choice for furniture with beautiful grain that you want to showcase. Clear polyurethane varnish, applied in two to three coats over bare or lightly prepared wood, produces a durable, water-resistant surface that protects the wood while leaving its natural colour and pattern fully visible. It is the classic finish for teak and sheesham, and it is the most forgiving choice for furniture repair: because the finish is clear, minor colour variations between repaired and original areas are less likely to be visible than under a coloured stain. Water-based clear varnish dries quickly and has low odour — a significant advantage for indoor furniture refinishing. Oil-based polyurethane varnish takes longer to dry and has stronger solvent smell during application but produces a slightly harder, more amber-toned film that many people find warmer and more traditional in appearance on dark hardwoods.
Wood stain — a transparent or semi-transparent coloured finish — allows you to change the colour of the wood while preserving the visible grain pattern. Stain penetrates into the wood fibres rather than sitting on top, which means it does not add a film to the surface; a clear topcoat is applied over the stain to provide the protective surface film. Staining is the technique for making a light timber appear darker, for achieving a consistent colour across a piece that has uneven grain colour, or for matching the colour of new repair wood to the surrounding original. In India, walnut, teak, mahogany, and ebony stain colours are widely available and are the most commonly used for furniture. Apply stain with a cloth or brush in the direction of the grain, wipe off any excess before it dries, and allow to fully cure before applying the clear topcoat.
Opaque paint — the chalk paint, enamel, or lacquer approach — is appropriate for furniture where you want a solid colour finish, where the wood grain is not worth showcasing (rubber wood, particleboard, heavily filled surfaces), or where you are making a deliberate style statement with colour. Painted furniture is having a resurgence in Indian interiors — muted greens, warm whites, terracotta, and dusky blues on solid wood side tables, bookshelves, and bedroom furniture are a very different aesthetic from the traditional polished wood finish, and it works beautifully in contemporary and eclectic Indian homes. For an opaque paint finish, a wood primer is the essential foundation: it bonds to the bare wood, blocks any tannin bleed-through, and provides a uniform surface for the topcoat. Two coats of a good quality interior enamel, PU enamel, or chalk finish paint over primer will produce a durable, wipe-clean surface.
Application Techniques for a Professional-Looking Result
The difference between a professional-looking furniture finish and a DIY result that looks painted is almost entirely in the application technique — specifically, in coat thickness control and the between-coat treatment.
For brush application, use a high-quality natural bristle brush for oil-based varnishes and enamels, and a synthetic bristle brush for water-based finishes. A cheap brush leaves bristle marks and shedding bristles in the finish surface that are very difficult to remove after drying. Load the brush moderately — not dripping, not dry — and apply with long, smooth strokes in the direction of the grain. On flat surfaces, work systematically from one edge to the other, keeping a wet edge to avoid lap marks. On vertical surfaces and edges, work top to bottom.
Apply thin coats, not thick ones. A thick coat of varnish sags on vertical surfaces, traps solvent beneath the surface, dries slowly, and produces an uneven, cloudy film. A thin, even coat dries faster, levels better, and produces a clearer, more uniform film. Two or three thin coats are always a better strategy than a single thick one.
Between coats, a light de-nib — a very light sanding with 320 or 400 grit paper, or a light rub with fine steel wool — removes any dust nibs, bristle marks, or surface irregularities from the previous coat and provides a mechanical key for the next. Wipe away all sanding dust with a tack cloth before the next coat. This step is what separates the finish on professional furniture from DIY results — the between-coat de-nibbing produces a level, even surface that the final coat can lie on perfectly. Skip it, and the accumulated surface defects from each coat remain visible in the final finish.
For the final coat on a piece that you want a very smooth, almost polished result on, apply the last coat, allow it to fully cure for 48 to 72 hours, then rub the entire surface with 0000 steel wool or very fine wet-and-dry paper (800 grit) lubricated with a small amount of mineral oil or furniture wax. This final rubbing removes the last surface irregularities and produces a smooth, even sheen that is distinctly more refined than the as-applied finish.
Special Considerations for Indian Conditions
Refinishing furniture in India requires a few additional considerations that do not apply in temperate climates. The monsoon season — high humidity, sustained moisture in the air — significantly affects the drying and curing behaviour of many finish products. Water-based finishes can become tacky and slow to dry at very high humidity, and oil-based varnishes can develop a whitish haze (blushing) if they are applied or curing in high-humidity conditions. The practical implication is that furniture refinishing in India is best done during the dry season, or — if it must be done during the monsoon — in a well-ventilated indoor space where air circulation reduces local humidity. Never apply varnish or lacquer when the relative humidity is above 70 to 75 percent if you can avoid it.
Temperature also matters. Most wood finishes apply best between 15°C and 35°C. In peak Indian summer conditions, where workshop or home temperatures can exceed 40°C, the finish dries so fast that it is difficult to work to a level surface — brush marks set before they can be levelled out. Early morning application, when temperatures are lowest, is the practical solution in summer months.
Solid wood furniture in India also moves — the combination of monsoon swelling and dry-season shrinkage produces measurable dimensional change in solid hardwood pieces over the course of each year. A rigid, brittle finish — old shellac, certain lacquers — will crack at the joints as the wood moves. A flexible finish — modern polyurethane varnish, water-based acrylic varnish — accommodates this movement without cracking. This is another reason why old-fashioned shellac or cellulose lacquer on Indian furniture tends to look crazed and cracked within a few years: the finish could not flex with the wood beneath it.
Maintenance: Extending the Life of the Finished Surface
A correctly applied furniture finish can last five to ten years before refinishing is needed, but only with some basic maintenance care. The practical measures are simple: wipe spills promptly — leaving water or other liquids sitting on a varnished surface for extended periods will eventually cause white rings, particularly under repeated exposure. Use coasters under glasses and hot pads under serving dishes. Avoid placing furniture in direct sunlight for extended periods — UV exposure yellows oil-based varnishes and chalks and fades water-based ones over time.
Once or twice a year, apply a coat of furniture wax to clear-varnished surfaces and buff to a soft sheen. The wax provides a sacrificial layer over the varnish that takes the minor abrasion of daily use and can be renewed easily. When the wax layer wears away, the varnish surface beneath remains intact and protected. For painted furniture, a periodic wipe with a slightly damp cloth followed by a dry buff is all that is needed for maintenance. If the paint develops chips or scratches, touch up promptly with the same paint colour — small damage addressed promptly prevents water ingress and the larger failures that follow.
The Zorvanta Approach to Wood Furniture Finishing
At Zorvanta, our wood finishing range is designed for the full spectrum of Indian furniture refinishing needs — from the clear protective finishes that showcase the grain of a beautiful teak or sheesham piece, to the coloured wood stains that allow you to harmonise furniture colour with a new interior scheme, to the primer and enamel systems that deliver a hard-wearing painted finish on solid wood and engineered furniture. Our Timber Gold Pro clear wood varnish is formulated for Indian hardwoods — fast drying, excellent water resistance, and colour-stable under Indian UV conditions. Our wood primers provide the sound adhesion foundation that every painted furniture finish depends on, and our interior PU enamel range delivers a durable, smooth topcoat in any colour.
Furniture refinishing done well is deeply satisfying — taking a piece that looked past its best and restoring it to a finish that is better than new. Explore our full wood finishing range, read our companion guides on choosing the right wood finish and surface preparation before painting, or contact our team for product-specific guidance. To request a quotation for a professional furniture refinishing project, get a quote here.
Frequently Asked Questions (FAQs)
1. Can I paint over existing varnish on wooden furniture without stripping?
Yes, in many cases — provided the existing varnish is in good condition (no flaking, peeling, or bubbling), clean, and not too glossy for adhesion. Lightly sand the existing surface with 150 to 180 grit to dull the sheen and give the new coat a mechanical key, wipe clean, and apply a furniture primer or a bonding primer before your topcoat. If the existing finish is failing or heavily built up, stripping back to bare wood gives a more predictable and durable result.
2. What is the best finish for a dining table that will see heavy daily use?
For a dining table taking daily food and liquid exposure in an Indian home, a two-component polyurethane (PU) varnish — a separate resin and hardener mixed before application — provides the highest abrasion, chemical, and water resistance of any furniture finish category. Oil-modified polyurethane single-pack varnish is a close second and is considerably easier to apply. Both are significantly more durable than standard oil-based varnish or water-based acrylic varnish for a high-use horizontal surface.
3. How do I stop wooden furniture from swelling and cracking during the monsoon?
Solid wood will always move with seasonal humidity changes — this is a property of the material, not a defect. The measures that reduce the impact are: ensuring the furniture is finished on all six faces (top, bottom, and all four sides), so moisture uptake and release is even from all surfaces; keeping furniture away from direct monsoon rain exposure; and using a flexible, elastic varnish formulation rather than a rigid one. Traditional shellac and old cellulose lacquers are brittle and crack at joints under seasonal movement. Modern polyurethane varnishes are elastic enough to accommodate normal wood movement without cracking.
4. Can I use wall paint on wooden furniture?
It is technically possible, but not recommended for surfaces that see regular contact or cleaning. Interior wall emulsions are formulated for porous, static wall surfaces, not the handling, abrasion, and frequent wiping that furniture surfaces receive. They dry to a soft film that marks easily and is not washable at the level furniture needs. For furniture, use a dedicated furniture paint (chalk paint, furniture enamel, or PU enamel) that is formulated for the mechanical demands of furniture surfaces and applies over a proper wood primer.
5. How long should I wait between sanding and applying varnish?
After final sanding, remove all sanding dust with a tack cloth or a lint-free cloth dampened lightly with white spirit. Allow the surface to be fully dust-free and at room temperature before applying the first finish coat. There is no required waiting time beyond ensuring the surface is clean and dry. However, on teak and other oily hardwoods, wipe the sanded surface with acetone or thinners to remove surface oils, and allow 10 to 15 minutes for the solvent to fully evaporate before applying varnish — this step significantly improves adhesion on oily species.
6. My old wooden almirah has a dark stain I cannot sand out. What should I do?
Deep stains that penetrate below the surface that sanding can safely reach without compromising the wood thickness require a different approach. A dark stain applied over the entire piece — matching or darker than the stain colour — can make the existing discolouration invisible by bringing the surrounding wood to the same colour as the stained area. Alternatively, for an almirah that has structurally good wood but a compromised surface, an opaque painted finish in a solid colour completely eliminates the stain question by concealing the wood surface entirely. This is increasingly a preferred approach on older almirahs that are being given a contemporary update in colour rather than a traditional restoration.
Need help choosing the right finish?
Talk to our team or request a tailored quotation for your project.