How to Paint Your Home Like a Pro: A Complete Step-by-Step DIY Guide for Indian Homes
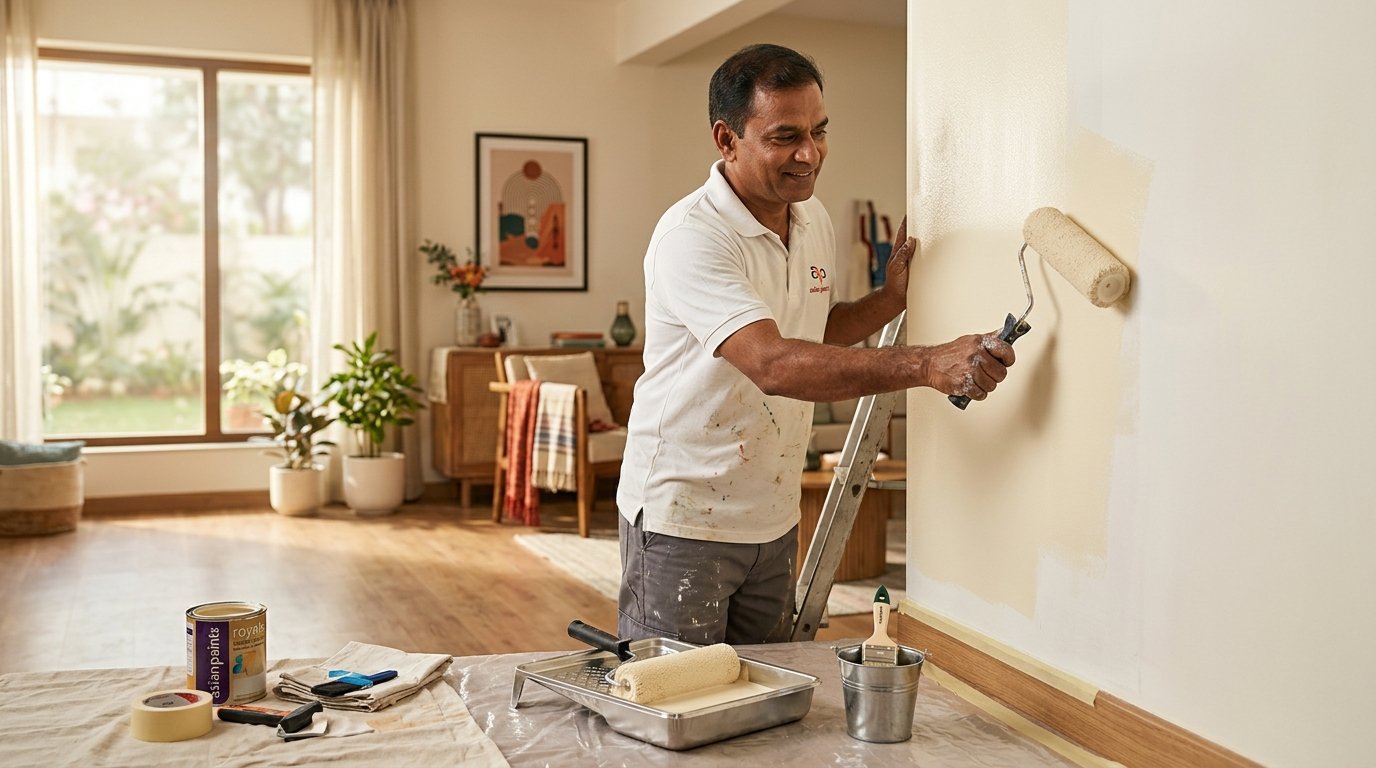
Walking through a freshly painted room — every surface clean and even, the colour exactly what you imagined — produces a satisfaction that few home improvement projects can match. It also produces results that can last a decade or more if the job is done correctly from the first step to the last. Painting your own home is not complicated, but it is a process. Every stage depends on the stage before it, and the shortcuts that seem to save time in the middle almost always add hours of correction work at the end.
This guide covers the complete process of painting interior walls in an Indian home — from understanding your wall type and choosing the right materials to the final coat and cleanup — with practical detail at every step. It is written specifically for Indian conditions: the cement and lime-plastered walls that are standard in Indian construction, the humidity and temperature swings that affect drying and application, and the products and tools that are readily available in the Indian market.
Whether you are repainting a single room or refreshing an entire flat, the principles here apply equally. Follow the sequence and the result will look and last like professional work.
Understanding Indian Wall Types Before You Start
Most walls in Indian homes are constructed from brick or concrete block, plastered with two or three coats of cement mortar, and finished with a skim coat of lime putty or polymer putty that creates the smooth, paintable surface. This is fundamentally different from the drywall construction common in many Western countries, and it means the wall has very different absorption characteristics, alkalinity levels, and potential failure modes.
Newly plastered cement walls are highly alkaline — the pH of fresh cement plaster can exceed 12 — and this alkalinity must come down before any quality paint system is applied. Painting over uncured, highly alkaline plaster causes a phenomenon called saponification, where the alkali attacks the binder in the paint and causes the film to become soft, sticky, and eventually peel. New plaster should be allowed to cure for a minimum of 28 days before painting, and in some cases longer, depending on the thickness of the plaster and the ambient conditions during curing.
Older walls in Indian homes often carry years of accumulated paint layers, varying degrees of moisture exposure, and possibly areas of hollow or detached plaster that are not obvious to the eye until you tap the surface. Understanding the condition of your existing wall before you begin determines most of the preparation work required — and preparation is where the final result is won or lost.
Step 1 — Assemble the Right Tools Before You Begin
The quality of the tools you use directly affects the quality of the finish you can achieve. Cheap rollers leave texture behind; cheap brushes lose bristles in the paint film; a poorly designed paint tray makes loading the roller uneven. Investing in reasonable quality tools for a single project will produce a better result and make the work significantly easier.
For a typical Indian interior room, you will need the following:
- Rollers: A 9-inch roller frame with a microfibre or medium-pile cover (10–12 mm nap) for smooth and slightly textured walls. A shorter 6-inch roller for tighter areas around windows and corners. Have two covers so one can be loaded while you work with the other.
- Brushes: A 3-inch angled cut-in brush for edges, corners, and around frames. A 2-inch brush for smaller detail work. Synthetic bristles for water-based paints; natural bristles for oil-based enamel.
- Paint tray with liner: A deep-well tray gives you more room to load the roller evenly. Disposable liners save considerable cleaning time between coats and colours.
- Extension pole: A 1.2 to 1.8 metre extension pole that screws into the roller frame. This allows you to reach the full wall height without a ladder for most ceiling heights, reducing fatigue and improving the uniformity of your roller technique.
- Putty knife and sandpaper: A 6-inch flexible putty knife for applying filler to cracks and imperfections. Sandpaper in 80-grit (for rough repairs), 120-grit (for surface preparation), and 220-grit (for between-coat light sanding).
- Masking tape: Quality painter's tape (blue or green masking tape, not the pale cream type) for protecting trim, switches, and edges. Do not use cheap yellow tape — it bleeds and tears.
- Drop cloths: Proper canvas or heavy plastic sheeting to protect flooring and furniture. The time spent spreading drop cloths is nothing compared to the time spent cleaning paint off a wooden floor.
- Stirring stick and bucket: For mixing paint thoroughly and for cutting and rolling from a bucket when working on large areas.
Gather and lay out everything before you open the first tin. Stopping mid-application to find a brush or more tape breaks your rhythm and can cause visible lap marks in the paint.
Step 2 — Prepare the Room Thoroughly
Room preparation is the first stage that separates professional work from amateur results, and it is the one that impatient painters consistently underinvest in. Every hour spent preparing the room saves two hours of correction later.
Begin by removing as much furniture as possible from the room, or grouping everything in the centre and covering it with drop cloths. Remove switch plates, socket covers, curtain rods, and picture hooks. Use a flathead screwdriver to remove them carefully and place them in a labelled bag so you know which goes back where.
Spread drop cloths over the entire floor area, lapping them at least 30 centimetres up the skirting board. Secure the edges with painter's tape to the skirting so they do not shift when you walk over them. Tape masking paper or plastic sheeting over any fixed fittings — ceiling fans, built-in lights, air conditioning units — before you begin overhead work.
Apply painter's tape carefully along all edges where the wall meets the ceiling, the skirting, door frames, and window frames. Press the tape edge firmly with a putty knife or your fingernail to prevent paint bleed. The quality of this taping determines the sharpness of every visible edge in the finished room — take the extra time to do it carefully.
Step 3 — Inspect and Repair the Wall Surface
Before any paint or primer goes on, the wall surface must be assessed and all defects repaired. Walk slowly around the room and inspect every wall section carefully, using a raking torch beam (a torch held at a low angle close to the wall surface) to make surface irregularities visible that would be invisible under normal room lighting.
Mark every crack, hole, hollow area, and patch of loose material with a pencil. Tap the surface across the full wall area with your knuckles — a hollow sound indicates that the plaster has separated from the substrate beneath. Hollow areas must be hacked back to sound plaster and replastered or filled with a two-part epoxy filler before painting. Painting over hollow plaster merely hides the problem temporarily — within one or two seasons, the delaminated area will crack and lift through the paint film.
Fill all cracks with a ready-mixed filler or polymer putty compound, pressing it firmly into the crack with a putty knife and drawing it flush with the surrounding surface. For wider cracks (more than 3 mm), first undercut the crack slightly with the putty knife tip to create a mechanical key, then apply filler in two stages — a first fill that is slightly underfilled, allowed to dry, lightly sanded, and then topped flush. Trying to fill a wide crack in one thick pass causes the filler to shrink and leave a depression as it dries.
Allow all filler repairs to dry completely — at least 4 to 6 hours for ready-mix fillers, and longer in humid conditions. Sand all repairs smooth with 120-grit sandpaper wrapped around a block. The repaired area should be flush with the surrounding wall; any depression or proud patch will be visible under paint, particularly in raking light.
Once repairs are complete, sand the entire wall surface lightly with 120-grit paper to degloss any previous paint and improve primer adhesion. Dust down thoroughly with a soft brush, then wipe the entire surface with a slightly damp cloth to remove all sanding dust. Allow to dry completely before priming.
Step 4 — Apply the Primer Coat
Priming is not optional. This is the step that beginners most commonly skip or minimise, and it is the single biggest determinant of how well the topcoat performs. In Indian homes, where walls are cement-plastered and often carry significant porosity variations from repairs, old paint, and different plaster ages, a proper primer coat creates a uniform base that allows the topcoat to go on evenly and bond correctly.
Choose your primer based on the condition of the wall. For walls in good condition over existing paint, a standard interior acrylic primer-sealer is appropriate. For bare or freshly plastered walls, an alkali-resistant primer is essential — it creates a chemical barrier between the alkaline plaster and the paint binder, preventing saponification. For walls with staining from water marks, smoke, or tannin bleed-through from wood, a stain-blocking primer prevents the discolouration from bleeding through the finished paint coat.
Apply primer with a roller using the same technique you will use for the topcoat (described in Step 5). Cut in at all edges with a brush first, then roll the field. Do not worry about achieving a perfect finish on the primer — its job is to seal and bind, not to look beautiful. What matters is complete coverage with no missed patches, particularly over repaired areas.
Allow the primer to dry fully according to the manufacturer's guidance before applying topcoat. In Indian summer conditions (high temperature, moderate humidity), water-based primers can be ready to recoat in 2 to 4 hours. In monsoon conditions (high humidity, lower temperature), allow 6 to 8 hours or longer. Applying topcoat over damp primer causes adhesion failures and slow, uneven drying of the topcoat.
Once the primer is dry, lightly sand the entire surface with 220-grit sandpaper to smooth any minor texture raised by the primer. Dust down again before applying topcoat.
Step 5 — The Topcoat: Technique That Makes the Difference
The technique you use to apply the topcoat determines the final appearance more directly than almost any other variable. Roller technique, in particular, is something that looks simple but takes practice to do well. Here is the professional sequence:
Cut in first, roll second. Begin every coat by cutting in with a brush at all edges — ceiling line, skirting board, door frames, window reveals, and corners. Cut in approximately 5 to 8 centimetres from each edge. The cut-in area does not need to be perfectly smooth at the brushed edge because the roller will feather into it — what matters is that you cover every edge with paint so the roller does not need to go right into the corner where it would leave a visible texture line.
Load the roller correctly. Pour paint into the deep well of the tray, and roll the roller into the paint until it is evenly loaded. Run the roller back and forth on the ribbed slope of the tray to work the paint into the nap evenly and remove excess. A correctly loaded roller should be uniformly wet but not dripping. A roller that drips is overloaded and will leave runs; a roller that squeaks or skips is underloaded and will produce thin patches.
Work in sections. Divide the wall mentally into manageable sections approximately one metre wide. Apply paint to each section using a W or M pattern — roll the paint on in a diagonal W shape first to distribute it across the section, then go back over it with vertical strokes to even out and blend. This technique ensures the paint is spread evenly without lines forming at the edge of the roller.
Maintain a wet edge. The most important rule in applying any paint by roller is to always roll into a section that has not yet dried. If you allow a section to dry before the roller returns to it, the roller will leave a lap mark — a visible double layer at the point where wet paint met dry. Work at a pace that keeps the paint you have already applied wet enough to blend with the next section. In hot, dry conditions, this means working more quickly; in cool, humid weather, you have more time.
Use light pressure on the final pass. When you complete a section, make one final light pass from ceiling to skirting with the roller at minimal pressure, barely touching the wall. This final pass levels any texture variation left by the working passes and produces a more uniform finish. Professional painters call this "laying off."
Step 6 — Apply the Second Coat Correctly
Interior paint in good condition over a properly primed surface almost always requires two topcoats for full colour depth, uniform sheen, and adequate hiding power. The first coat seals the primed surface and establishes the colour; the second coat brings the finish to its designed appearance and durability. Applying only one topcoat reduces the effective performance and lifespan of the paint system, regardless of how the manufacturer describes the covering power of the product.
Allow the first topcoat to dry completely before applying the second. In typical Indian summer conditions, 4 hours between coats is a reasonable minimum for quality acrylic interior paints; in monsoon conditions, allow 6 to 8 hours. Touch the first coat lightly with a fingertip in an inconspicuous area — it should feel completely dry and cool, not tacky or slightly sticky. If it is at all tacky, it is not ready.
Before the second coat, inspect the first coat carefully in raking light. Any minor texture, lap marks, or raised fibres from the roller should be lightly sanded with 220-grit paper and dusted down. This between-coat sanding is one of the habits that most clearly distinguishes a professional paint finish from an amateur one — the result after the second coat is noticeably smoother and more even.
Apply the second coat using exactly the same technique as the first, including cutting in before rolling. The second coat goes on faster than the first because the surface is sealed and the roller does not need to work as hard to deposit paint evenly.
Step 7 — Remove Masking Tape and Clean Up
Masking tape must be removed while the final coat of paint is still slightly tacky — not wet, not fully dry. Removing tape from fully dry paint often tears the paint film, particularly at corners and edges where the paint has formed a continuous layer over the tape edge. The ideal moment to remove tape is when the paint is dry enough not to run or smear but soft enough that it will separate cleanly at the tape edge.
Pull the tape back at a 45-degree angle, slowly and smoothly, keeping the pull close to the wall rather than at a right angle away from it. If a section tears, stop immediately, score the paint film along the tape edge with a sharp blade, and continue pulling. Do not rush this step — ragged edges from incorrectly removed tape are time-consuming to fix neatly.
Clean all tools immediately after finishing work. Water-based paints clean out of rollers and brushes with warm water — roll and rinse until the water runs clear, then reshape the roller nap and hang brushes to dry bristle-end down. Cleaned and correctly stored rollers and brushes can be reused many times and are worth the care. Rollers left overnight with paint on them are essentially disposable.
Seal paint tins tightly with the lid pressed down firmly around the full circumference — never with a hammer blow to a single spot, which deforms the rim and means the tin will never seal properly again. Store paint upside down for the first few minutes after sealing to create a paint seal around the lid interior. Properly stored paint in a sealed tin, kept in a cool, dry location away from direct sun, can remain usable for two to three years.
Common DIY Painting Mistakes in Indian Homes — and How to Avoid Them
Painting without a primer on bare or replastered walls. Cement plaster is porous and alkaline. An unprepared surface will absorb topcoat unevenly, producing a patchy, dull finish that uses far more paint than necessary and is prone to early failure. Always prime bare plaster, especially in repaired areas, with an appropriate alkali-resistant primer before topcoating.
Applying paint too thick in a single coat. A thick single coat takes far longer to dry than two thin coats, is prone to runs and sag on vertical surfaces, traps solvent that compromises the film quality, and can peel as the outer skin dries before the inner film. Two thin coats at the correct spreading rate will always outperform one heavy coat, in both appearance and durability.
Painting in direct afternoon sun on a hot wall. A wall surface in direct sun in Indian summer can reach temperatures of 50°C or more. Paint applied to a surface this hot dries on the outer film before the underlying material has properly formed, producing wrinkling, bubbling, and poor adhesion. Apply paint in the morning when surfaces have cooled overnight, or on a shaded wall.
Painting during peak monsoon humidity. Interior paint applied when the relative humidity is above 85 percent will dry very slowly, may not form a proper film, and is susceptible to moisture-related defects including blistering and mould growth in the wet film. Plan interior painting for the drier periods between monsoon spells, or use a dehumidifier in enclosed rooms during application and drying.
Using cheap tools with good paint. A quality paint delivered by a poor roller will produce a textured, uneven finish that no amount of careful technique can fully correct. The tool controls how the paint goes on. Match the quality of your tools to the quality of your paint, and both investments will perform at their best.
Not allowing the wall to fully dry between repainting cycles. If walls were recently washed, have experienced damp, or carry freshly applied plaster repairs, they must be completely dry before any coating is applied. Painting over even slightly damp plaster or masonry traps moisture beneath the film and creates ideal conditions for blistering, mould, and adhesion failure within the first season.
Calculating How Much Paint You Need
Calculating paint quantity accurately before buying prevents both waste and the frustration of running short mid-project. The method is straightforward. Measure the total paintable wall area in square metres: the combined width of all walls, multiplied by the ceiling height, minus the area of all doors and windows (approximate each door at 1.9 m² and each window at 1.4 m², adjusting for actual size).
Divide the total area by the spreading rate of the product you are using — this figure is stated on the tin as square metres per litre and varies by product and surface condition. For a primed, smooth surface, most quality interior emulsions spread at 10 to 14 m² per litre per coat. For bare, porous plaster, reduce this by 20 to 30 percent. Multiply by the number of coats (primer plus two topcoats as a minimum), and add 10 percent as a contingency for cutting in, drips, and roller losses.
Buy from the same batch wherever possible. Different manufacturing batches of the same colour can have subtle variations that become apparent when panels from different batches meet. If you need multiple tins of a custom-tinted colour, have them all tinted at the same time from the same base batch.
The Zorvanta Range for DIY Interior Projects
At Zorvanta, our Deco Gold Pro interior emulsion range is specifically developed for Indian wall types and climate conditions. The formulation provides excellent adhesion to lime-putty and polymer-putty finished plaster surfaces, delivers consistent sheen without variation between batches, and is designed to dry within the time windows that allow sensible two-coat same-day application in typical Indian temperature ranges. The range is available in flat matte, eggshell, and satin finishes to suit every room and design intent.
For a home where both walls and woodwork require repainting — the complete room refresh — our Deco Gold Pro interior emulsion for walls and our PU Enamel Pro for doors and window frames work as a coordinated system. The Deco Gold Pro wall sheen and the PU Enamel Pro trim sheen are calibrated to complement each other at the wall-to-trim junction, producing the clean contrast that distinguishes a well-finished room.
If your project includes any exterior repainting, read our companion guide on exterior wall painting and monsoon protection, and our detailed guide on surface preparation for a complete picture of what a professional result requires. For colour selection, our guide on colour psychology in interior spaces will help you make decisions you will still be satisfied with years later.
For product recommendations, custom colour matching, or a quotation for both materials and application, contact our team or use our online quotation tool.
Frequently Asked Questions (FAQs)
1. How many coats of paint does a wall in an Indian home need?
A minimum of one primer coat and two topcoats is the correct specification for most interior walls. On bare or newly plastered walls, an alkali-resistant primer is essential before topcoating. Skipping the primer or reducing to a single topcoat compromises both appearance and durability.
2. How long should I wait between coats?
For quality water-based interior emulsions in typical Indian summer conditions (28–35°C, moderate humidity), allow 4 hours minimum between primer and first topcoat, and between first and second topcoat. In monsoon conditions with high humidity, extend this to at least 6 to 8 hours. Always test by touch — the surface should feel completely dry and cool before recoating.
3. Can I paint directly over old paint without stripping it?
Yes, provided the existing paint is in sound condition — well bonded, not peeling, chalking, or blistering. Sand the existing paint to degloss and improve adhesion, clean thoroughly, then prime before topcoating. If the old paint is peeling in any area, remove it back to a sound layer before proceeding. Painting over peeling paint simply extends the peeling.
4. How do I avoid roller marks and lap lines?
Lap marks form when wet paint meets dry paint. Work at a pace that keeps the wet edge alive, always rolling into the wet area rather than starting from a dry edge. Cut in a section at a time rather than the entire room, then roll it before cutting the next section. In large rooms, work with a partner — one cutting in, one rolling — to maintain the wet edge more easily.
5. What is the best time of year to paint interior walls in India?
The post-monsoon period — October to February — offers the best conditions for interior painting across most of India: moderate temperatures, lower humidity, and good airflow for drying. The pre-monsoon period (March–April) is also workable if ambient humidity is still low. Avoid peak monsoon months (June–September) if possible, as high humidity significantly slows drying and increases the risk of moisture-related paint failures.
6. Should I thin the paint before applying?
Modern quality interior emulsions are formulated at the correct consistency for roller and brush application and should not require thinning. Over-thinning reduces hiding power, extends drying time, and reduces the film thickness achieved per coat — all of which degrade the final result. If the paint feels difficult to work, check that it has been thoroughly stirred (pigment and binder can settle in storage), not that it needs thinning. If thinning is genuinely needed for spray application, follow the manufacturer's guidance precisely and do not exceed the stated dilution rate.
Need help choosing the right finish?
Talk to our team or request a tailored quotation for your project.