Painting Over Damp & Stained Walls: The Complete Repair & Repaint Guide for Indian Homes
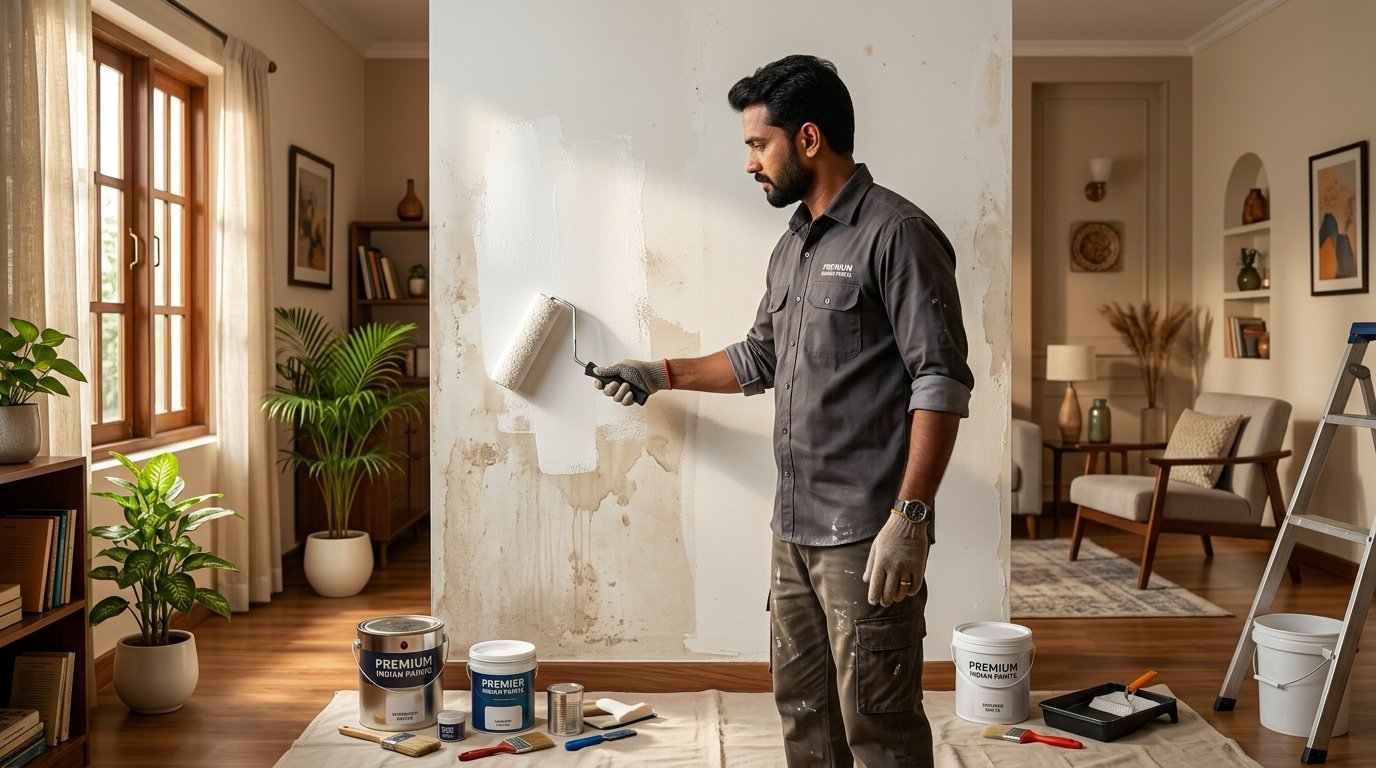
Open any Indian homeowner group or renovation forum and within minutes you will find the same photographs: a freshly painted wall, maybe two months old, with a familiar brown-yellow stain bleeding through the white emulsion. Or a skirting area where the paint is blistering and peeling in soft, papery flakes. Or a room where the wall near the window frame has turned a mottled grey-green. These are not random failures. They are predictable outcomes — the result of painting over a problem instead of fixing it first.
The frustration is understandable. Repainting looks like a solution. The wall looks clean and bright the day after painting. The problem has not gone away, though — it has been temporarily hidden. Water, salts, and biological growth have been sealed under a film of fresh emulsion, and they will work their way back through within one season. Understanding why this happens — and, more importantly, what to do instead — is the core of this guide.
We will cover the main types of wall staining and dampness that Indian homeowners encounter, how to correctly diagnose the source, the specific repair procedures that actually work, and the right sequence for applying primer, sealer, and topcoat to produce a repainted surface that genuinely lasts. Every step in the right order — that is the difference between a wall that holds for five years and one that fails in five months.
Diagnosing the Problem First: Why This Step Cannot Be Skipped
Before any repair work begins, you need to understand what you are actually dealing with. Dampness and staining on interior walls can come from several completely different sources, and the repair method for each is different. Applying the wrong treatment wastes time and money and leaves the underlying cause intact.
Water seepage from outside is the most common cause of damp patches on external walls in Indian homes. Rain penetrates through cracks in external render, through porous masonry, or through failed waterproofing on a terrace or parapet above. The damp patch on the interior is the exit point — the actual entry point is usually on the external face of the same wall or on the roof above. This type of dampness gets worse during and after rain and dries slowly between rains.
Rising damp appears as a horizontal band of dampness and staining at skirting level, typically up to about one metre above the floor. It is caused by ground moisture wicking upward through masonry by capillary action. It is most visible during and after the monsoon and in the post-monsoon period, and it tends to recur in the same location every year. A distinctive signature of rising damp is a tide mark where salts have been deposited as the water evaporated — a crusty white or grey deposit at the upper edge of the damp zone.
Condensation dampness occurs on cold surfaces — typically external walls in rooms with poor ventilation and high moisture production, such as bathrooms, kitchens, and laundry areas. It produces a generalised damp feel to the wall surface, often with dark mould growth in corners where ventilation is worst. Unlike seepage or rising damp, condensation dampness is present even in the dry season if the room is consistently poorly ventilated.
Plumbing leaks produce rapid, localised dampness that does not follow weather patterns. A wet patch that appeared suddenly near a pipe run or around a fitting, that does not dry fully even in dry weather, is almost always a plumbing issue that must be addressed by a plumber before any painting work begins.
The diagnostic principle is simple: match the pattern, location, and timing of the dampness to the likely cause, then confirm by addressing the source. A patch that dries out completely in dry weather and reappears with rain is external seepage. A band at skirting level that is always present but worse after rain is rising damp. A persistent damp area that has no weather correlation and is near pipework is plumbing. Do not proceed to painting until you have addressed the source — painting is always the last step, not the first.
Dealing With Efflorescence: The Salt Problem
Efflorescence — the white, powdery, or crusty deposits that appear on walls, particularly after the monsoon — is one of the most common and most mishandled wall problems in Indian homes. It is not a stain in the conventional sense. It is salt. Specifically, it is soluble salts that were already present in the masonry or plaster — in the bricks, the sand, the cement — that have been dissolved by water moving through the wall and deposited on the surface as the water evaporated.
The mistake almost everyone makes is to paint over it. Efflorescence on a freshly plastered or recently dried wall looks like a light haze that can be brushed off. The temptation is to brush it off, prime, and paint. But the salts do not stop. As long as moisture continues to enter the wall — even in small amounts — the salt migration continues, and more crystallises just beneath the paint film. Within a season, the crystals grow, pushing the paint film up from behind, producing blisters and flaking that look exactly like a paint failure but are in fact a salt problem covered by paint.
The correct approach to efflorescence requires three stages. First, allow the wall to dry fully — and in India, this means waiting for an extended dry period, not simply a few dry days after the rains. New plaster on a masonry wall can take six to eight weeks to fully dry out, and repainting before that window is one of the most common causes of early paint failure in new construction.
Second, brush away all efflorescence deposits thoroughly with a stiff dry brush. Do not wet the surface during this stage — wetting the salts redissolves them and drives them back into the wall surface. Remove the dry deposits mechanically. If the deposits have formed a hard crust, careful chipping or scraping may be needed to remove the layer.
Third, treat the surface with an efflorescence neutraliser — a dilute acid treatment that reacts with any remaining salt deposits and neutralises them before you prime. This step is particularly important when the efflorescence has been heavy or recurring. After neutralising, rinse the surface, allow it to dry again fully, and then prime with an alkali-resistant primer before applying the topcoat. If the moisture source has been properly addressed and the wall has been allowed to dry fully, the correctly primed and painted surface will hold.
Handling Mould and Fungal Growth on Interior Walls
Black, green, or grey mould patches — most common in bathrooms, corners of poorly ventilated rooms, and areas adjacent to water sources — must be treated before repainting, not painted over. A coat of fresh emulsion applied directly over active mould growth will look clean for a few weeks. Within a month, the mould will have grown through the paint film and be visible again, often worse than before because the paint film has provided a slightly more insulating environment that the mould colony benefits from.
Remove all mould growth first. For surface mould on a sound plaster base, a dilute bleach solution — one part bleach to three parts water — applied with a brush or sponge and left for 15 to 20 minutes will kill the surface growth. Scrub, rinse, and allow the wall to dry thoroughly. For heavy or recurring mould, a proprietary antifungal wall treatment provides more complete kill of the spore colony. These are available from paint suppliers and are applied as a wash before any repainting work begins.
After treatment and drying, assess whether the plaster substrate has been damaged. Persistent mould growth in the same location — year after year, or immediately returning after treatment — indicates an ongoing moisture supply that is feeding the colony. Treat the source, not just the symptom. If the plaster has been softened or damaged by moisture and mould, hack it out to a sound substrate, replaster, allow to fully cure, and then apply an antifungal primer before the topcoat. A standard emulsion applied over a mould-prone wall is insufficient — use a paint that specifically includes an antimicrobial biocide in the formulation, or specify a dedicated anti-mould interior paint for problem areas.
Preparing the Surface: The Work That Makes the Paint Job Last
Once the source of moisture has been addressed and any active problems — efflorescence, mould, biological growth — have been treated, the physical preparation of the wall surface begins. This stage is where most homeowners and painters want to shortcut, and where the majority of paint job failures originate.
Remove all flaking, loose, and hollowing paint. Tap the wall surface with your knuckles — a hollow sound indicates that the plaster or paint is delaminated beneath, still visually attached but with no bond to the substrate underneath. This material will fail regardless of what is painted over it. Remove it cleanly back to a sound substrate. Feather the edges of any removed areas so there is no abrupt step between the patched area and the surrounding paint film.
Fill all cracks, holes, and surface defects with an appropriate filler. For hairline cracks, a ready-mixed wall putty applied by blade is sufficient. For wider cracks — anything above two to three millimetres — rake the crack out to a clean V profile, brush away dust, dampen slightly, and fill with a cement-based patching compound or polymer-modified repair mortar in layers, allowing each layer to dry before the next. Do not attempt to fill a deep crack in a single thick application — deep fills crack through the centre as they dry and shrink.
Sand the entire surface after patching to level any irregularities and to provide a mechanical key for the new primer coat. This is often skipped on repaints, but it makes a visible difference to the finish quality and significantly improves primer adhesion on smooth or slightly shiny old paint surfaces. A fine sandpaper — 80 to 120 grit depending on the surface texture — and a systematic, complete coverage of the wall area is the right approach.
Clean the surface of all dust, loose material, and any remaining surface contamination before applying any product. A damp wipe-down followed by a full drying period removes the sanding dust that would otherwise be sealed under the primer coat.
Choosing the Right Primer for a Damp or Stained Wall
Standard wall primer is not the right choice for a wall with a history of dampness, staining, or salt migration. A standard PVA primer seals and binds a clean, sound surface effectively — but it does not block stains, resist alkali attack from fresh cement, or provide the moisture-resistant interface needed on a wall that has had water problems.
For walls repainted after damp or staining problems, the correct primer specification depends on the specific situation. An alkali-resistant primer is essential on any freshly plastered surface or any surface where the alkalinity of the substrate is still high — fresh cement and lime-based substrates are strongly alkaline, and this alkalinity attacks the binder in some topcoat formulations, causing saponification and paint failure. Alkali-resistant primers neutralise this risk and provide a stable interface between the alkaline substrate and the topcoat.
A damp-seal or stain-blocking primer is the specification for walls where water stains, rust marks, smoke residue, or tannin bleed-through from timber are present. These specialised primers contain binding agents and barrier components that prevent the staining material from migrating through into the topcoat. They are typically solvent-based, which gives them superior penetration and blocking capability compared to water-based equivalents. Apply a stain-blocking primer and allow it to fully dry before any topcoat — rushing this step is the most common reason that stains bleed back through a freshly painted surface.
On a wall that has had active seepage and has been treated for efflorescence and mould, a waterproof primer-sealer provides an additional barrier against residual moisture movement in the substrate while also providing adhesion for the topcoat. This is the belt-and-braces specification for problem walls and is worth the additional cost on surfaces that have had persistent or recurring problems.
Applying the Topcoat: Finish Quality on a Repaired Surface
With the surface properly prepared and correctly primed, the topcoat application follows standard best practice for interior painting — but with a few specific considerations for repaired surfaces.
Apply a minimum of two coats of the topcoat, allowing adequate drying time between coats. On a heavily patched and repaired surface, the texture differences between patched areas and surrounding paint can read through a single topcoat. Two coats applied correctly — with the first coat reducing the porosity differences between substrate and patched areas, and the second coat delivering the final colour and finish — produce a much more uniform result than a single heavy application.
For areas that have had active mould or are in high-moisture environments — bathrooms, kitchens, rooms with limited ventilation — specify an interior emulsion with a built-in antimicrobial additive or use a dedicated anti-mould paint. These formulations contain biocides that resist the growth of mould and mildew on the cured paint film, extending the interval before biological growth can re-establish. They are not a substitute for addressing the ventilation or moisture source that feeds the mould, but they provide meaningful additional resistance on a correctly prepared surface.
Choose a finish sheen appropriate to the room and the wall condition. Matte and flat finishes are forgiving of minor surface irregularities — they scatter light rather than reflecting it, which reduces the visibility of any slight unevenness in a patched surface. Eggshell and satin finishes are more washable and appropriate for kitchens and bathrooms but will make any surface irregularity more visible. On a heavily repaired wall, matte in the first painting cycle, followed by the preferred finish sheen once you are confident the wall is stable, is a practical approach.
The Zorvanta Approach to Interior Wall Repair & Repainting
At Zorvanta, we formulate our Deco Gold Pro interior range specifically for the conditions that Indian homes face — the alkalinity of freshly plastered surfaces, the humidity challenges of the monsoon, and the long-term durability needed on walls that see daily use across seasonal extremes. Our alkali-resistant primer provides the correct interface for new and repaired plaster, and our interior topcoats are formulated with the hiding power and adhesion needed to deliver a clean finish over a correctly prepared repaired surface.
For problem walls — those with a history of seepage, staining, or recurring paint failures — our technical team can recommend the specific combination of sealer, primer, and topcoat that matches the wall's actual condition and history. We do not apply a one-size specification to a problem that requires diagnosis. Understanding what the wall has been through, and specifying the right product system for that specific situation, is what produces a paint job that holds up rather than one that looks good for a month and fails by the next monsoon.
Explore our full interior coatings range, or read our companion guides on complete surface preparation before painting, diagnosing common paint problems, and monsoon-proofing your home with the right waterproofing system. For a wall-specific recommendation and a quotation, contact our team or request a quotation online.
Frequently Asked Questions (FAQs)
1. Can I paint directly over a damp wall?
No. Painting over a damp wall produces a paint film that cannot bond properly to the wet substrate. The result is peeling, blistering, and stain bleed-through within weeks. The wall must be dried fully, the source of moisture must be addressed, and any surface damage — salt deposits, mould, loose plaster — must be treated before any painting product is applied.
2. What is the best primer for a wall that had water damage?
For walls with water stain marks, a stain-blocking solvent-based primer is the most effective barrier against stain bleed-through. For walls repainted after salt migration and efflorescence, an alkali-resistant primer over a clean, dry, treated surface provides the correct adhesion interface. For walls in ongoing high-humidity environments, a waterproof primer-sealer adds an additional moisture barrier. The right choice depends on the specific type of damage — your paint supplier can advise based on the wall's history.
3. How long should I wait to repaint a wall after a damp problem?
The wall must be fully dry — which in India can take considerably longer than in temperate climates. After addressing the moisture source and completing any replastering, allow a minimum of four to six weeks of dry weather before priming. For walls that have had severe or prolonged dampness, longer drying periods are needed, and a moisture meter used to verify substrate moisture content before painting is a worthwhile investment for any significant repaint project.
4. Will anti-mould paint stop mould coming back?
Anti-mould paint resists the growth of mould on the cured paint film and will extend the interval before regrowth significantly, but it is not a permanent solution to a ventilation or moisture problem. If the conditions that caused the mould — high humidity, poor air circulation, a cold surface — have not been addressed, mould will eventually re-establish even on an antimicrobial film. Anti-mould paint is part of the solution, not the whole solution.
5. How do I stop the same stain bleeding through fresh paint?
If a stain is bleeding through fresh emulsion, a standard primer has not blocked the staining material from migrating. The solution is to apply a stain-blocking primer — typically a solvent-based shellac or alkyd formulation — over the affected area, allow it to dry fully, and then recoat with the topcoat. Applying more coats of emulsion over an unblocked stain will not solve the problem; the staining material will continue to migrate through any number of water-based topcoats.
6. Is putty necessary before painting repaired walls?
Wall putty — the white finishing compound applied over primer to produce a smooth, gap-free surface before the topcoat — is standard practice in Indian interior painting and is highly recommended on any repaired wall. Patching compounds and plaster repairs, even when sanded, can leave slight texture differences relative to the surrounding surface. Wall putty applied over primer fills these micro-variations and creates the smooth, even surface that produces a high-quality topcoat finish. Apply putty in thin layers, allow each layer to dry, sand smooth, and then topcoat for the best results.
Need help choosing the right finish?
Talk to our team or request a tailored quotation for your project.